

These buttons link to the other Rollover Navigation example pages.
The buttons on this page were created in Photoshop and then placed in DreamWeaver using the Insert menu.
Photoshop : I created a plain background and used FX and added Bevel and Emboss and added a drop shadow.
Then I took the same shape, offset it slightly and used FX to give it an inner shadow. The box looks like you pushed it in. Make a second copy of the text and move it down slightly too.
Save each button set (a background and one text item per each button) for an onload view and a rollover view. I saved mine as png24 files (with a transparent background)
DreamWeaver : I created a div to place them in - I made mine have text-align: center
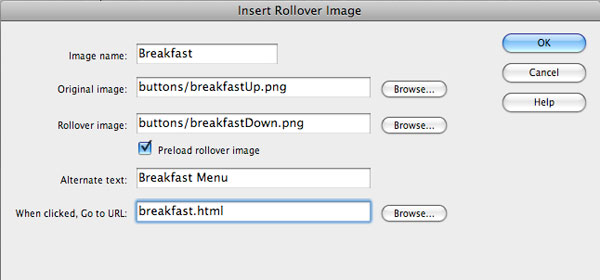
Go up to the top menu bar : Insert > Image Objects > Rollover Image
This brings up the Insert Rollover Image Menu. Fill in the information, browse to your buttons. The original button - is the onload button. Be sure to add Alternate Text and the url if you know it. I added the buttons one after another, in one div. They follow each other in a line.