Transferring Files to the School Server using WinSCP (PC)
To transfer files from your computer to your Web folder on MiraCosta College's Web server follow the steps outlined below:
-
If you haven't downloaded WinSCP, you can do so at the following URL:
http://winscp.net/download/winscp436setup.exe - Extract the winscp.exe application from the zip file and double-click it to open the application.
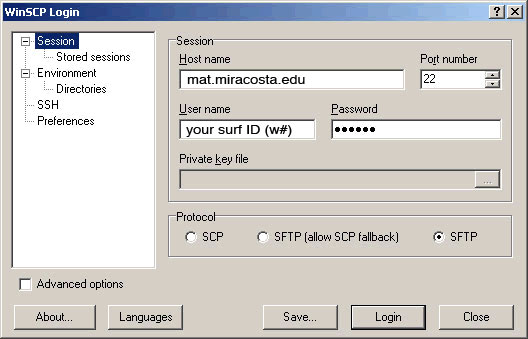
- In the WinSCP Login properties dialog box,
enter the following values:
- Host name: mat.miracosta.edu
- User name: YourUserName (surf id)
- Password: Your Password
- Check the SFTP radio button.
The following screenshot demonstrates typical options:
- Click the Directories option in the left window pane.
- Under Remote Directory, type the name provided by your instructor. (Use web:/) Be sure to include the forward slash. The following screenshot demonstrates the Web directory as the remote directory:
- Click Login
- Click OK in the next screen (maybe two screens - they look like errors but they are not).
- You'll get this screen:
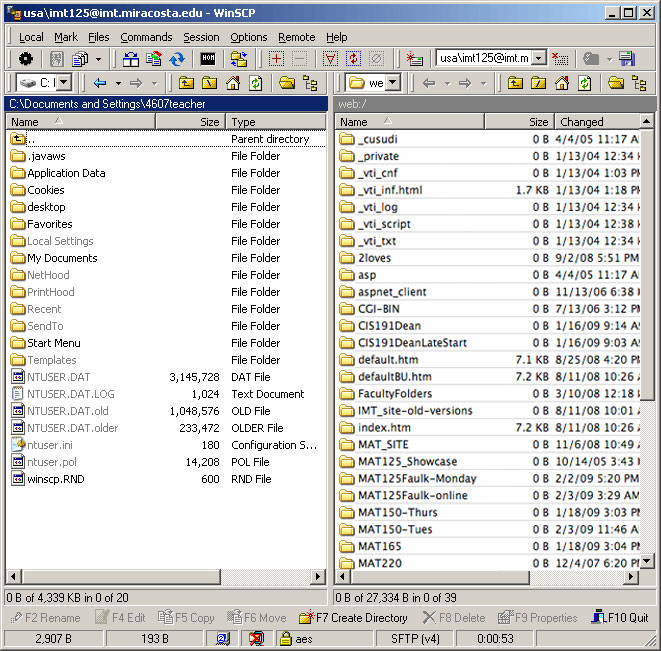
- The left window is your local machine. The right window is the server. Navigate the left screen till you find your files that you want to upload.
- Click on the MAT125Faulk folder and open it. Open the appropriate folder where you want to put your files. When you select our folder it will show the 1HOMEWORK folder. Click on this to see all the Exercise folders.
- To transfer your files, simply select the files from the Local Files window and drag them carefully over to the left Remote Files window and place them in the correct Exercise folder.